One day as I was scouring through a blogroll I discovered Funky Junk Interiors and I just loved what Donna had done to her place and all the innovative projects she did. Donna is a master in creativity and her story of how she came into blogging and design is interesting. Take a moment and check out her story and home at www.funkyjunkinteriors.net. Below is a snapshot of her story and home. Enjoy!
THURSDAY, MAY 27, 2010
About Funky Junk Interiors

facebook twitter subscribe email me

How it all began
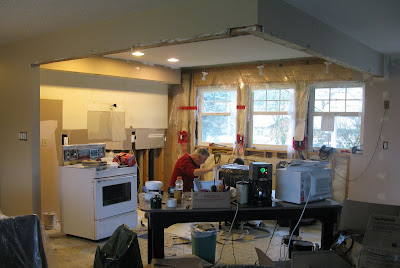
Once upon a time, I purchased my current home that required loads of work. Thinking I could pull it off myself, I soon realized I was going under pretty quick. Having few tool skills, I did my best to attempt to fix what was broke, but it was way beyond my own capabilities.
Then one day, a knock on my door opened to a wonderful team of folks offering to help me fix my place!

It was a dream come true. I fired up my first blog, Our Extreme Home Makeover Experience to document the renos for the team. (story HERE)
A year later, the renos left me with a beautiful new home! Only trouble was, my exhausted funds left me with nothing to decorate with. I knew then if I wanted to furnish my pretty new old home, I'd have to get wildly creative.
So I started curbside diving and thrifting with a vengeance! Found objects were put to work in every nook and cranny. I also learned how to swing a few tools with the help of some great friends and started to tackle the mysterious world of building stuff.
This is when Funky Junk started up. I held my breath many times before hitting publish because my stuff was... different.

Many evenings, I'd post something then go to bed. I was so nervous, I'd get up to remove the post only to notice I was too late... comments! Oh no... GULP. I'd hold my breath and read... and they were GOOD! Some even better than good! I honestly couldn't believe my eyes.
I soon realized I had a means of giving back for all the good that had been done towards me. So I kept cranking out easy to create projects coming from nothing ensuring to teach what I just learned so anyone could join in, make their own homes prettier and find their own creative outlet. I wanted them to grow just as I was.
I soon realized I had a means of giving back for all the good that had been done towards me. So I kept cranking out easy to create projects coming from nothing ensuring to teach what I just learned so anyone could join in, make their own homes prettier and find their own creative outlet. I wanted them to grow just as I was.

From there, I went crazy. I no longer worried what others may think. I realized what was making me happy was also making others happy and eventually those that liked what they saw would follow along if they desired.
The blog continues to grow beyond my wildest expectations! It appears that most of you also desire to make something out of nothing for next to nothing. You want to learn and hone your own skills!
I'm happy to say, that's served up here more than regularly.
I'm happy to say, that's served up here more than regularly.
THURSDAY, MAY 27, 2010
Hello all! I'm Donna, and reside in beautiful BC Canada alongside my 11 yr old son, 1 dog and 2 cats.

We have a typical 2 level home that was recently and beautifully renovated in nearly every single room with lots of help. However with depleted funds after the reno, I was forced to get ultra creative with my decorating in order to furnish it.
So I started gathering what others would normally consider 'junk'. And when you haul junk home, you need to put your creative cap on! Best thing that ever happened to me was not being able to afford what I desired. :)


From decorating, gardening, inspirational writeups, tutorials and lots of tool swingin', it's all shared here as a means to encourage anyone that they CAN have nice things for their home and they CAN do it themselves.
You see, I know what it's like to feel helpless with no skills and penniless for new things. My mantra? If you can't buy it, find it and make it! Stick around and I'll show you how.
Anyway, come on in and check out some of the most affordable decor ever!

Once the creations started to become a reality, the blog Funky Junk Interiors was born.
From decorating, gardening, inspirational writeups, tutorials and lots of tool swingin', it's all shared here as a means to encourage anyone that they CAN have nice things for their home and they CAN do it themselves.
You see, I know what it's like to feel helpless with no skills and penniless for new things. My mantra? If you can't buy it, find it and make it! Stick around and I'll show you how.
Anyway, come on in and check out some of the most affordable decor ever!
~ stairway ~


Not being able to afford to carpet my stairs, I decided to paint the original wood instead. With only craft paint and my own made stencils, the only thing this cost me was a little creativity. :)
Related links to the stairway
~ Livingroom ~


Desiring something other than curtains, I created these 'gate screens' to frame out the picture window. Pine tongue and groove boarding was air-nailed onto existing privacy screens for a quick and easy one of a kind window treatment.

I love layering, and how it has the potential to chime in with many elements in a room.

Legs were added to an old pallet, creating a rustic TV stand. The legs were built at the perfect height to allow for authentic crates to store movies.
The bonus? The showcase created out of the top. For more junk of course. :)


The fireplace was created by friend Dan and his crew. They placed cultured stone over top the existing brick, created a mantel and beefed up the corbels to give the room an impressive focal point.


Most recently, I created an old gate from scrap wood to brighten up the fireplace area. Because the scale of the fireplace is so large, equally over sized accessories make filling up the space a lot of fun!

I also switch out to this coffee table now and then. Like the stairs, I created a stencil and simply decorated the top of an outdoor table.
I also switch out to this coffee table now and then. Like the stairs, I created a stencil and simply decorated the top of an outdoor table.
related links to the livingroom
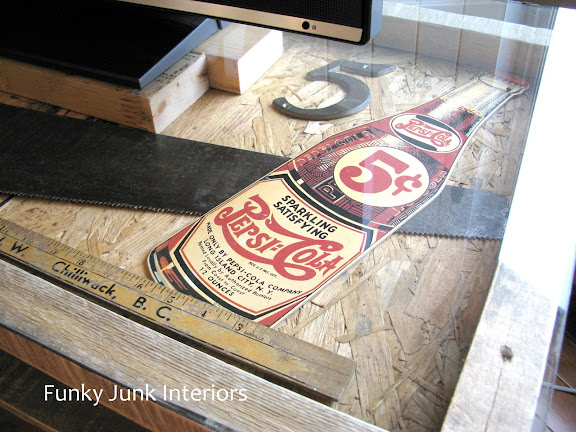
~ Blog office ~

What do sawhorses, an old ladder plus some pallet wood make?

Why, a blog office desk of course! This use to be the dining room we never used. Now it's a kitchen office I can't stay out of. :)
The shelving is simple Ikea storage type shelving most would put in their garage. The wall unit created floor to ceiling fun without hindering light from the two side windows.
Pallet wood was used to support the shelf unit to tie in with the desk.


The top was lettered up alongside big bolts set into drilled holes to resemble random planks from here and there.

Even my nifty rusty gears are put to work. The flattest one is my drink coaster.

unique picture frame ideas HERE

The wall unit is a blast to work with. The vignettes are forever changing.
related links to the blog office
pallet desk reveal (part of a 6 part series)
wall unit build
wall unit staging
~ Kitchen ~


Because the upstairs is now open floor plan, taking center stage in this space is a massive 2 sided metal topped island, fabricated by friend Dan. I designed the top with plenty of softer radius curves, which help to minimize it's visual strength. Dan took it from there and added his take on it. It turned out perfect. :)

The metal was left in it's natural state, which comes as a black finish. Wherever sections were welded, grinding took place, leaving a wonderfully distressed finish. An option is to wax the surface to avoid rust, but I happen to like a little rust here and there. :)
The topper is totally self supporting on it's own legs, which simply slipped over top stock cabinets.

A white twig chandelier was created by shaping willow and grapevine branches against an existing chandelier.


unique picture frame ideas HERE
The wall unit is a blast to work with. The vignettes are forever changing.
related links to the blog office
pallet desk reveal (part of a 6 part series)
wall unit build
wall unit staging
~ Kitchen ~


Because the upstairs is now open floor plan, taking center stage in this space is a massive 2 sided metal topped island, fabricated by friend Dan. I designed the top with plenty of softer radius curves, which help to minimize it's visual strength. Dan took it from there and added his take on it. It turned out perfect. :)

The metal was left in it's natural state, which comes as a black finish. Wherever sections were welded, grinding took place, leaving a wonderfully distressed finish. An option is to wax the surface to avoid rust, but I happen to like a little rust here and there. :)
The topper is totally self supporting on it's own legs, which simply slipped over top stock cabinets.
A white twig chandelier was created by shaping willow and grapevine branches against an existing chandelier.
During renos, the three windows replaced one lonely one, bringing the outdoor sunlight in, as well as offering a wonderful view of the backyard. Rather than curtains, 'see through' junk decorate the windows, allowing full throttle sunshine in.
Whoops.. lights weren't yet finished in this pic. :)

The black you see along the ceiling is MDO board cut and painted to look like metal sheeting. The rivets you see are wood plugs. This fabrication was to alleviate intense ceiling repair when a cabinet header was removed during renos.

Although not officially 'needed', the two lamps flanking the sink truly enhance countertop tasks and cast a wonderful evening glow. I couldn't do without the extra light now!


Most recently, I just created a Farmers Market sign with a spring theme in mind. It's fun to change this area out on a whim and is a rather fun curtain alternative. :)

A board and batten treatment was applied to the drywall behind the stove, further bringing in brightness and all things white.
links to the kitchen
kitchen build
grocery sign
white twig chandelier
Farmers Market sign
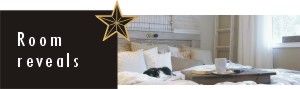
~ The master bedroom ~

Welcome to what I affectionately call this room, The White Trash Bedroom. :)
This room is totally all about found treasures put together to create a rumply crumply pillowy haven, wearing many shades of white.

At times, my bedside painter's ladder, showing off a few pretty shades under it's coat of white,

... holds a favorite magazine to flip through at my total leisure.

Other times the ladder holds a few of my favorite things. Just because.
The camisoles were found in my Mom's closet, the Bible a gift from my Grandmother, and the pearls from my Mom's jewelry box. A ladder of special memories, honoring two of my favorite gals.

You won't find this bed neat, tidy and symmetrical. This bed is about rumpled crumpled comfy bliss. With waaaay too many pillows and a touch of lace.


Twinkling tea lights play well with a whisper of woodsy rustic, my favorite kind of finish.

An old gate grouped with metal clad siding and an old door creates a headboard with substance! And the works is highlighted with a random board and batten wall treatment to further enhance the whites.

The bedside tray is an old topper from a small table.


The vintage dresser, topped with a vintage headboard, wears an authentic crackle finish you can only achieve from many many years.

An absolute stroke of luck was finding that all the vintage hardware was different! I left them untouched, they were perfect. Check. Out. That. Crackle! Amazing.

I love the memories this collection offers. My mom's jewelry box and parent's tea pot from their wedding gift collection have a very special place here.

A collection of some thrift store finds tie in beautifully with the treasured jewelry box. The tiniest gold snowflakes dot the top, a detail I love. The lampshade was created out of torn white sheets in which the layers cast the most amazing layered glow.


The rusty old headboard is one of my favorite places to hang some of my favorite pictures and other treasures.

Fresh fragrant blooms always get first dibs in the teapot!

The rusty old headboard is one of my favorite places to hang some of my favorite pictures and other treasures.

bedroom related posts
bedmaking tutorial on the rumply crumply style
~ The Sign Playroom ~


An old grocery sign behind a daybed sets the tone for my son's playroom.

Extensions were added to a regular sized storage unit from Ikea to claim precious space all the way up to the ceiling. Bins all have covered lids to keep toys dust free.

One red feature wall was the perfect touch to liven up the space without overwhelming it.
~ The Stars and Bricks Bedroom ~

Stars and a torch from Ikea cast a fun night time glow in this boy's bedroom.

A mix of greys and blues tie in with the painted brick scheme and dusk like walls and ceiling.

A coordinating sheet took the place of cabinet doors to help brighten up this little corner.
The brick treatment is paint stamped on with a sponge to create a brick effect.

The furniture was painted out in two tones to keep things light and bright along with a masculine touch.


Practicing spelling and math is actually FUN on the massive whiteboard. And drawing too. :)

Full bedroom reveal
But nothing stays the same for too long around here. The two rooms above? They're no longer. We've since knocked down the wall between the two creating one big tween cave for my lucky duck son.

LOTS more to come on this front!
~ Downstairs office ~

My newest creation is a16 foot long farm table style desk, created from pallet wood and cedar planks. The total cost for this desk was $3.00... for new screws. :)

Pallet and rustic details were celebrated, rather than hidden.


The cedar planks were sanded and left untreated and unattached. This makes moving around equipment wires a breeze!

Eclectic office props are everywhere you look. Even a unique lamp made out of a barn light and vintage ironing board gets in on the fun. :)
Desk reveal post HERE.
~ Upstairs Bathroom ~
The bathroom isn't yet complete, however here are a couple of shots.

The pedestal sink replaced a massive vanity which visually doubled the space.

An old headboard becomes a perfect place to hang towels and clothing.

Traditional curtains were replaced with a shutter created from pallet and fence wood.
How to make a barn wood shutter is HERE.

I haven't really openly blogged about this yet, however I tiled all my own floors. The above shot is what thebathroom floor looks like. Adding the little black diamonds was extra work, but the result is well worth it!

I like to invent and create designs. This shot is my most elaborate one to date in the entry way. One day when I finish it, I'll do a proper post on the process.
~ The outdoors ~

A little hidden sitting area greets you by the front door.

Which overlooks the front garden, sprinkled with bright blooms and junky treasures in all the right places.

This once a green house turned woodshed is covered with old fencing boards and barn windows.
The flowers are inside a firetruck crate painted out white.
The two boardwalks are pallets.


The birdhouse garden.

The vegetable old headboard garden.

Junk. The new indoor outdoor must haves. :)